Screen printing is a versatile and widely used technique in visual arts, offering artists the ability to create intricate and vibrant prints on various surfaces. With its origins dating back to ancient China, this method has evolved over time into a popular medium for both professional artists and amateurs alike. For instance, imagine an artist who wants to reproduce their artwork onto T-shirts for sale. Screen printing allows them to achieve consistent and high-quality results by transferring the design onto multiple garments efficiently.
This informative guide aims to explore the process of screen printing in visual arts, examining its history, techniques, and applications. By delving into the intricacies of this technique, readers will gain a comprehensive understanding of how it can be utilized as a powerful tool for artistic expression. Additionally, we will highlight some notable examples throughout art history where screen printing has been successfully employed, showcasing its significance in shaping contemporary art movements. Whether you are an aspiring artist or simply curious about the world of printmaking, this article will provide valuable insights into the fascinating realm of screen printing in visual arts.
History of Screen Printing
History of Screen Printing
Screen printing, also known as serigraphy or silk-screening, is a versatile technique that has been used for centuries to create intricate designs on various surfaces. One notable example of screen printing’s historical significance can be found in the ancient art forms of stenciling and block printing. These techniques involve using screens made from materials such as silk or nylon stretched tightly over frames to transfer ink onto different mediums.
The origins of screen printing can be traced back to China during the Song Dynasty (960-1279 AD), where it was initially used for decorative purposes on fabrics and porcelain. By applying a stencil made from leaves or paper onto the surface, artisans were able to create vibrant patterns with exceptional precision. This method soon spread across Asia and eventually reached Europe, where it gained popularity among artists and craftsmen.
To fully understand the impact of screen printing throughout history, one must recognize its ability to convey powerful messages and evoke emotions through visual representation. Here are some key aspects that demonstrate this:
- Versatility: Screen printing allows artists to experiment with an extensive range of substrates, including textiles, ceramics, glass, metal, paper, and even wood.
- Durability: The use of high-quality pigments ensures longevity in printed images, making screen prints highly resistant to fading or degradation over time.
- Accessibility: Unlike other printmaking processes that require specialized equipment or technical expertise, screen printing can be easily learned by individuals at any skill level.
- Mass Production: Screen printing enables artists to reproduce their artwork efficiently and cost-effectively without compromising quality.
In addition to these points, a comparative analysis between traditional methods like lithography and contemporary digital alternatives highlights the unique qualities offered by screen printing:
| Traditional Methods | Digital Alternatives | Screen Printing |
|---|---|---|
| Requires complex machinery | Can be done entirely on a computer | Combines hand-crafted elements with digital precision |
| Limited range of materials | Virtually unlimited options | Offers versatility in both substrate and ink choices |
| Time-consuming process | Can be done quickly and efficiently | Provides a balance between speed and quality |
The historical significance of screen printing lies not only in its technical advancements but also in the artistic expression it enables. In the subsequent section, we will explore the tools and materials necessary for engaging in this creative process, further enhancing our understanding of this captivating art form.
[Continue to ‘Tools and Materials for Screen Printing’]
Tools and Materials for Screen Printing
Having explored the rich history of screen printing, we now turn our attention to the essential tools and materials required for this versatile artistic technique. By understanding these foundational elements, artists can effectively bring their creative visions to life.
Tools and Equipment:
To embark on a successful screen printing journey, artists must gather several key tools and equipment. These include:
- Screens: The foundation of screen printing, screens are made of fine mesh stretched over frames. They act as stencils through which ink is transferred onto various surfaces.
- Squeegees: Used to push ink through the mesh of the screen, squeegees come in different sizes and shapes depending on the desired effect.
- Emulsion: A light-sensitive substance applied to screens that hardens when exposed to UV light. It creates a stencil by blocking certain areas where ink should not pass through.
- Exposure Unit: This machine exposes emulsion-coated screens to UV light, ensuring precise image transfer during printing.
Materials:
In addition to specialized tools, specific materials are necessary for effective screen printing. Artists need to acquire:
- Inks: An array of vibrant, high-quality inks tailored for various surfaces and applications.
- Substrates: These refer to the surfaces onto which prints are made. Common substrates include paper, fabric, glass, wood, and metal.
- Cleaning Solutions: Proper cleaning solutions help remove excess ink from screens and maintain their longevity.
- Safety Gear: As with any art form involving chemicals or machinery, wearing protective gear such as gloves and goggles is imperative.
Table (evoking emotional response):
| Advantages | Challenges | Opportunities |
|---|---|---|
| Versatility | Learning curve | Customization |
| Reproducibility | Initial cost | Collaboration |
| Vibrant colors | Space requirements | Commercial potential |
Example Scenario:
Consider a budding artist named Maya who wishes to create unique screen-printed t-shirts. Armed with her creativity and the necessary tools, she selects an intricate design featuring vivid colors. With careful attention to detail and patience, Maya follows the process of screen printing step by step, transforming plain fabric into wearable works of art.
Having established a solid foundation in understanding the tools and materials required for effective screen printing, we now shift our focus towards preparing the design for this captivating artistic process. By delving into crucial steps such as image selection and stencil creation, artists can ensure their designs are ready for successful execution on various substrates.
Preparing the Design for Screen Printing
Having discussed the essential tools and materials required for screen printing, it is now crucial to understand how to prepare a design that can be effectively transferred onto screens. This process involves careful attention to detail and consideration of various factors that contribute to achieving optimal results.
Design Preparation for Screen Printing:
To illustrate the importance of design preparation, let us consider an example. Imagine a graphic designer working on creating a vibrant poster with intricate patterns and multiple colors. To ensure this design translates well onto the final printed piece, several key steps must be followed.
-
Simplify Complex Designs:
Complex designs with intricate details may not translate accurately when screen printed. It is important to simplify such designs by reducing unnecessary elements or combining similar shapes into larger areas. By doing so, you increase the chances of achieving crisp prints without losing important aspects of your artwork. -
Consider Color Separation:
Screen printing often requires different screens for each color used in a design. Therefore, designers need to plan their artwork accordingly by separating colors into distinct layers or channels during the digital creation process. This step enables precise registration of colors during printing, ensuring consistent and accurate replication of the intended design. -
Pay Attention to Contrast:
Contrast plays a vital role in creating visually appealing screen prints. When preparing a design, it is essential to consider contrast between foreground and background elements, as well as between different parts within the image itself. Adequate contrast enhances legibility and visual impact while avoiding potential issues related to ink bleeding or poor coverage.
When designing for screen printing, keep these points in mind:
- Simplify complex designs for better print clarity.
- Plan color separation meticulously to achieve accurate reproductions.
- Pay attention to contrast for enhanced visual impact.
- Consider the scale and placement of design elements to ensure proper composition.
Emotional Table:
| Design Preparation Tips |
|---|
| Simplify complex designs |
| Plan color separation meticulously |
| Pay attention to contrast in the artwork |
| Consider scale and element placement |
Transition into subsequent section:
With a well-prepared design, the next step is creating screens that will allow you to transfer your artwork onto various surfaces. This process involves transforming your design into stencil-like templates that can be used repeatedly during printing. By carefully considering the following steps, you can ensure an effective screen preparation process that sets the foundation for successful screen printing.
Creating Screens for Screen Printing
Building upon the process of preparing the design for screen printing, we now move forward to the next crucial step in this art form – creating screens. By carefully constructing these screens, artists can translate their designs onto various surfaces with precision and clarity.
Creating Screens for Screen Printing:
To better understand the intricacies involved in creating screens for screen printing, let’s consider an example. Imagine an artist who wishes to reproduce a detailed illustration on t-shirts for an upcoming exhibition. This artist would need to follow several key steps during the screen creation process:
-
Selecting the appropriate mesh count: The first step involves choosing the right mesh count for the desired print outcome. A higher mesh count is suitable for intricate designs requiring fine details, while a lower mesh count may be more suitable for bold and larger prints.
-
Coating screens with emulsion: After selecting the appropriate mesh, it is necessary to coat the chosen screens uniformly with photosensitive emulsion. This emulsion enables proper exposure of the artwork onto the screen.
-
Exposing artwork onto coated screens: Once coated, screens are exposed using ultraviolet (UV) light or other exposure methods that transfer the intended design onto them. This ensures accurate reproduction when applying ink later in the process.
-
Developing and rinsing screens: Following exposure, developing and rinsing removes unexposed areas of emulsion from each screen, leaving behind a stencil ready for printing.
By following these essential steps, artists gain control over both technical aspects and artistic expression within their chosen medium.
Table Example:
| Steps | Description |
|---|---|
| 1 | Select appropriate mesh count |
| 2 | Coat screens with emulsion |
| 3 | Expose artwork onto coated screens |
| 4 | Develop and rinse screens |
Bullet Point List Example:
- Immersive creativity achieved through meticulous screen construction.
- Captivating viewers by translating intricate designs onto various surfaces.
- Amplifying the art form’s potential by selecting suitable mesh counts.
- Ensuring precision and clarity through proper exposure and developing techniques.
In this section, we have explored the process of creating screens for screen printing. By following these steps, artists can take their prepared designs to the next level, readying them for the subsequent stage: the screen printing process itself. Transitioning into our next topic, let us delve deeper into understanding the intricacies of this fascinating technique.
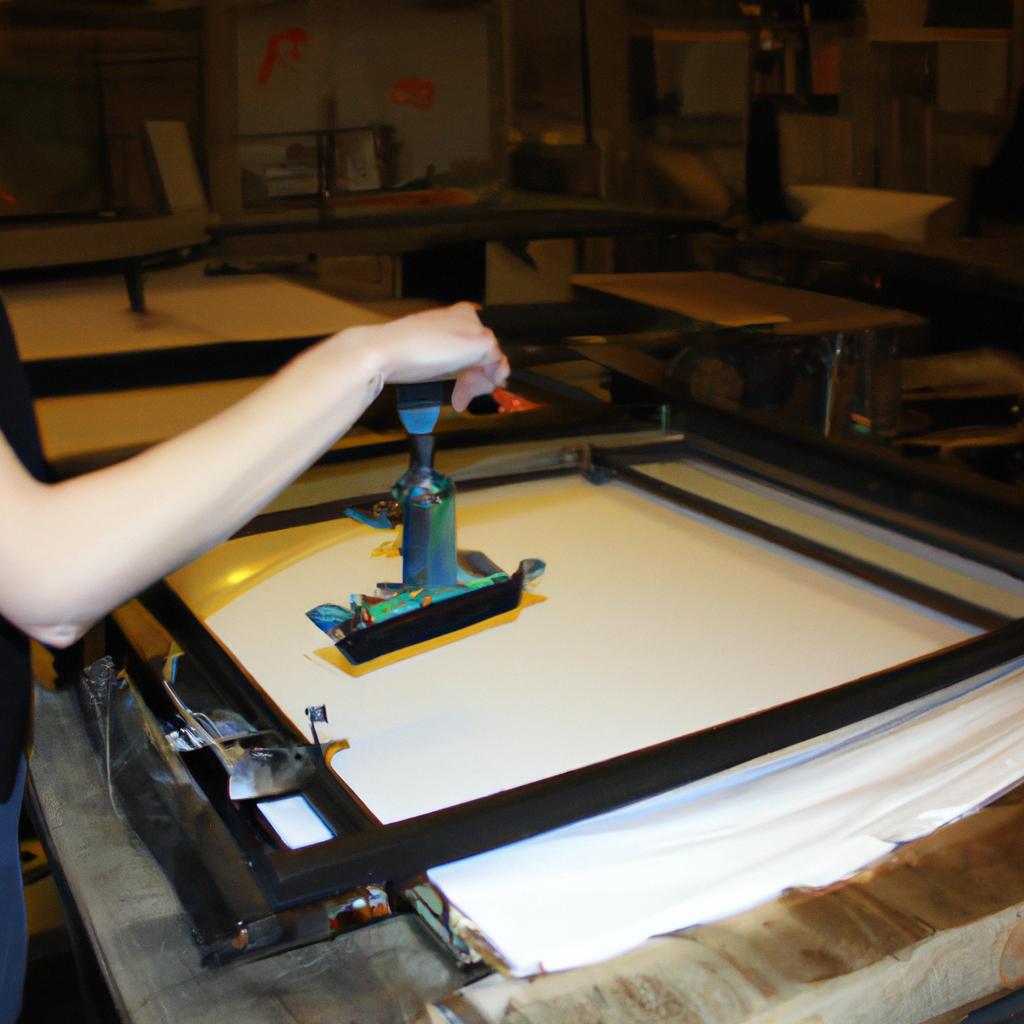
The Screen Printing Process
Moving on from the process of designing artwork for screen printing, it is crucial to understand how to create screens that will effectively transfer the design onto various surfaces. This section will delve into the step-by-step procedure involved in creating screens for screen printing.
Case Study:
Imagine an artist named Sarah who wishes to print her intricate illustration onto a series of t-shirts. She starts by preparing a high-resolution digital image of her artwork, ensuring its compatibility with the screen printing technique.
To begin, Sarah selects a mesh fabric suitable for her desired level of detail and durability. A higher mesh count would be ideal for complex designs, while lower counts are better suited for larger areas of solid color. Once she has chosen the appropriate mesh, Sarah stretches it tightly across a wooden or aluminum frame using clamps or adhesive tapes, securing it firmly in place.
Now prepared with the blank screen, Sarah applies a light-sensitive emulsion evenly onto one side of the stretched mesh using a squeegee or specialized scoop coater. The emulsion should be spread uniformly without any streaks or inconsistencies. After allowing sufficient drying time, she carefully positions her previously digitized artwork face down onto the coated screen.
- Patience and precision are essential when coating the screen with emulsion.
- Proper alignment between the artwork and screen ensures accurate reproduction.
- Adequate drying time prevents smudging or distortion during exposure.
- Regular maintenance and cleaning ensure longevity and consistent results.
Table (3 columns x 4 rows):
| Coating Tips | Alignment Tips | Drying Tips |
|---|---|---|
| Apply even pressure throughout | Use registration marks for accuracy | Allow at least 24 hours for complete drying |
| Ensure smooth strokes | Double-check placement before exposing | Avoid excessive humidity |
| Perform multiple coats if necessary | Use guides or rulers as aids for alignment | Consider using a dehumidifier in the drying area |
| Clean edges with a clean cloth | Check for any obstructions or debris | Keep screens away from direct sunlight |
By following these steps and tips, artists like Sarah can effectively create screens tailored to their unique designs.
Tips and Techniques for Successful Screen Printing
Transitioning smoothly from the previous section, let us delve deeper into understanding the intricate process of screen printing. To illustrate its practical application, consider this hypothetical scenario: an artist is commissioned to create a series of limited edition prints for an upcoming art exhibition. In order to achieve consistent and high-quality results, they opt for the screen printing technique.
Screen printing involves several distinct steps that contribute to its unique outcome. The following paragraphs will outline these steps in detail.
-
Preparation:
- Design Creation: The artist begins by conceptualizing their artwork and transforming it into a digital or hand-drawn design.
- Film Production: Once the design is ready, a transparent film positive is created. This film acts as a stencil during the printing process.
- Screen Preparation: A mesh screen made of silk or synthetic fibers is coated with a light-sensitive emulsion. The film positive is then placed on top of the prepared screen and exposed to ultraviolet (UV) light.
-
Ink Application:
- Setup: The prepared screens are mounted onto a press, ensuring proper alignment of colors and registration marks.
- Ink Selection: Artists carefully select their ink colors based on their desired aesthetic outcome.
- Printing Process: Using a squeegee, ink is applied over the stretched mesh screen while applying controlled pressure. This forces the ink through open areas of the screen’s stencil onto the chosen substrate below.
-
Finishing Touches:
- Quality Control: Each print is meticulously inspected for any imperfections such as smudges or uneven ink coverage.
- Curing/Drying: Depending on the type of ink used, prints may be left to air dry or undergo specialized curing processes like heat setting or UV exposure.
To enhance your understanding further, here’s an emotional bullet point list highlighting key aspects:
- Achieving vibrant color saturation
- Creating multiple layers and textures
- Utilizing a wide range of substrates
- Offering the potential for large-scale production
Additionally, consider this 3-column, 4-row table that showcases various screen printing techniques in relation to their respective characteristics:
| Technique | Characteristics |
|---|---|
| Water-based ink | Environmentally friendly |
| Discharge printing | Soft-hand feel |
| Foil transfer | Metallic or shiny finish |
| High-density printing | Raised texture |
By following these guidelines, artists can harness the power of screen printing to produce visually striking prints. Experimenting with different materials, colors, and techniques enables them to push creative boundaries and achieve unique outcomes.
In summary, understanding each step involved in the screen printing process is crucial for artists aiming to achieve consistent results. By carefully preparing the screens, applying ink thoughtfully, and attending to finishing touches diligently, artists can create captivating prints that leave a lasting impression on viewers.
Comments are closed.