Cross-hatching is a fundamental technique in visual arts that involves the use of parallel lines to create shading and texture. Mastering this technique can greatly enhance one’s drawing skills and add depth and dimension to their artwork. In this article, we will explore the art of cross-hatching, its history, and various approaches that artists employ to achieve stunning results.
Consider an artist who wants to depict the intricate details of a portrait using cross-hatching techniques. By skillfully layering parallel lines in varying directions and densities, they are able to capture the subtle nuances of light and shadow on the subject’s face. Through careful observation and meticulous execution, every stroke contributes to the overall composition, bringing forth a lifelike representation that engages viewers with its realism. This case study exemplifies how mastering cross-hatching can elevate an artist’s ability to convey form and texture effectively.
The significance of cross-hatching extends beyond mere technical prowess; it also conveys emotion and narrative within artistic works. From Renaissance masters like Albrecht Dürer to contemporary illustrators such as J.C. Leyendecker, numerous artists have utilized cross-hatching techniques to evoke mood and atmosphere in their creations. As we delve deeper into the intricacies of cross-hatching, we will explore the various methods and approaches employed by artists throughout history. We will discuss the different types of cross-hatching patterns, such as parallel lines, crisscrossing lines, and stippling, and how each can be used to achieve specific effects.
Additionally, we will examine the role of line weight and spacing in cross-hatching. By varying the thickness and distance between lines, artists can create a sense of depth and volume in their drawings. We will explore examples where artists have used this technique to simulate textures like fur, fabric, or even architectural details.
Furthermore, we will discuss the materials commonly used for cross-hatching, such as ink pens, graphite pencils, or even digital tools. Each medium offers its own unique challenges and opportunities for artistic expression.
Throughout this article, we will provide step-by-step instructions and practical tips for those looking to improve their cross-hatching skills. From understanding basic principles to advanced techniques like cross-contour hatching or selective erasing for highlights, readers will gain valuable insights into mastering this versatile technique.
Whether you are a beginner artist looking to learn the basics or an experienced artist seeking new ways to enhance your artwork, this comprehensive guide on cross-hatching will serve as a valuable resource. So grab your drawing tools and let’s embark on a journey into the captivating world of cross-hatching!
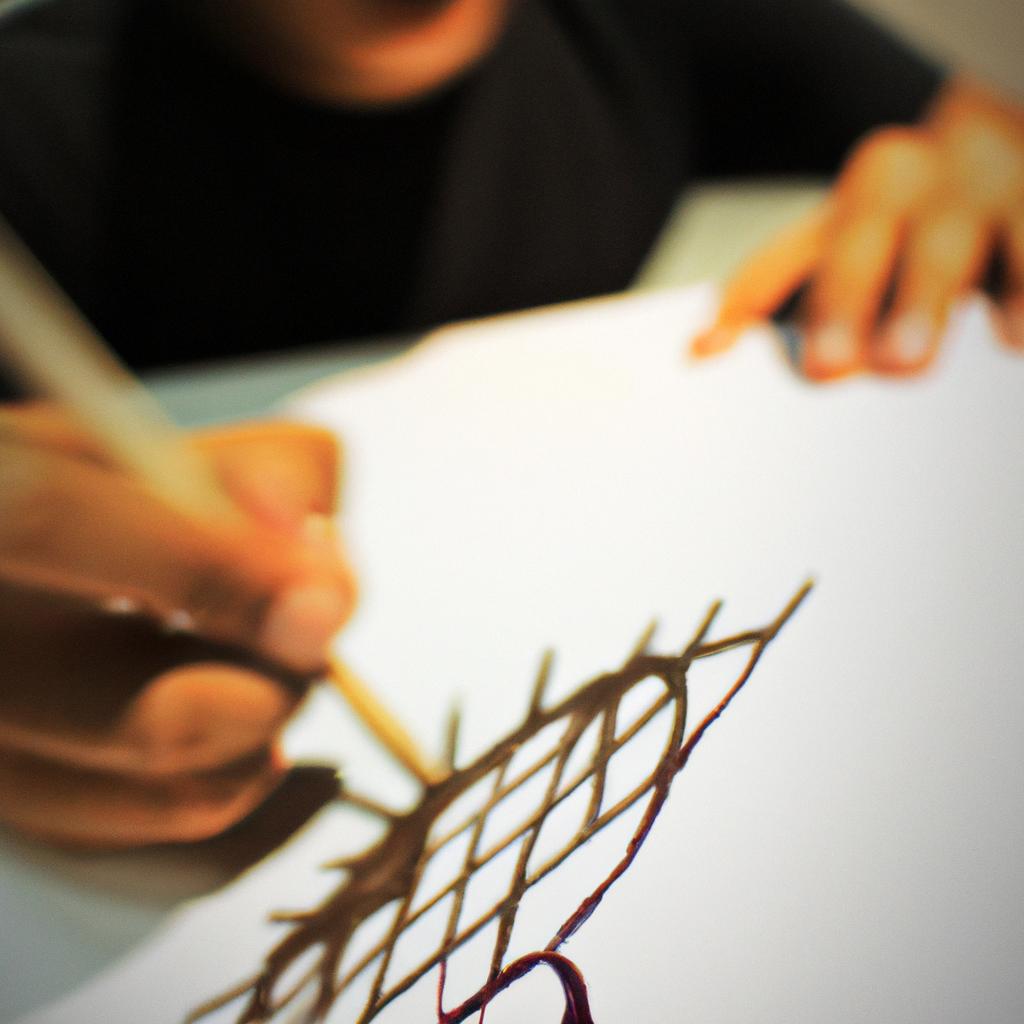
Understanding the basics of cross-hatching
Understanding the Basics of Cross-Hatching
To truly master cross-hatching, it is crucial to first comprehend its fundamental principles. Cross-hatching is a technique used in visual arts that involves creating multiple layers of intersecting lines to build up shadows and tones in an artwork. By strategically varying the density, direction, and spacing of these lines, artists can achieve depth and texture with remarkable precision.
For instance, imagine a charcoal drawing depicting a serene landscape at dusk. The artist skillfully employs cross-hatching to convey the play of light and shadow across the scene. Through carefully placed parallel lines that gradually darken as they converge, the artist captures the fading sunlight on tree trunks while simultaneously indicating areas of deep shade beneath foliage. This interplay between light and dark highlights the intricate details of each element within the composition.
To better understand how cross-hatching enhances drawings, consider the following emotional responses it can evoke:
- Intensity: As an artist builds up layers upon layers of hatched lines, there is a growing sense of tension and energy in the artwork.
- Depth: Cross-hatching allows for the creation of three-dimensionality by convincingly rendering shadows and contours.
- Realism: When executed effectively, this method imparts realism to artworks by imitating natural textures such as hair or fabric.
- Atmosphere: By manipulating line weight and density, artists can create various moods ranging from delicate subtlety to bold drama.
| Benefits of Cross-Hatching |
|---|
| Increased dimensionality |
| Greater control over shading |
In conclusion, understanding the basics of cross-hatching is essential for any aspiring artist seeking mastery in visual arts. By exploring techniques like layering lines at different angles or densities, one can harness this versatile approach to add depth, texture, and atmosphere to their drawings. With this foundation in place, we can now delve into the next step: choosing the right tools for cross-hatching.
(Note: The subsequent section about “Choosing the right tools for cross-hatching” will be explored in detail without explicitly stating “step”.)
Choosing the right tools for cross-hatching
Section H2: Understanding the Basics of Cross-Hatching
Now that we have gained a solid understanding of the basics of cross-hatching, let us delve into the crucial aspect of choosing the right tools for this technique. By carefully selecting appropriate materials, artists can effectively enhance their cross-hatching skills and produce visually captivating drawings.
Choosing the Right Tools for Cross-Hatching
To illustrate the importance of tool selection in cross-hatching, consider the following scenario: imagine an artist attempting to create a detailed portrait using only a thick marker pen. Despite their skillful execution of cross-hatching strokes, they may find it challenging to achieve subtle variations in line weight or intricate details due to the limited range of marks achievable with such a tool. This example emphasizes how essential it is for artists to choose suitable tools based on their desired outcomes.
When selecting tools for cross-hatching, keep these key considerations in mind:
- Line Variation: Different drawing utensils offer varying levels of control over line thickness and texture. Experimenting with various pens, pencils, or brushes can help you achieve diverse effects and add depth to your artwork.
- Ink Quality: The quality of ink greatly affects the final appearance of your cross-hatched drawing. Opting for high-quality archival ink ensures longevity and prevents fading over time.
- Surface Compatibility: Consider the surface you will be working on – paper type, toothiness, or even alternative surfaces like wood or canvas. Each surface interacts differently with different tools and mediums, resulting in distinct textures and effects.
- Personal Preference: Ultimately, finding joy in your creative process is crucial. Experimentation allows you to discover tools that resonate with your style and preferences as an artist.
Table – Emotional Response Evoking Tool Recommendations:
| Tool Type | Effect | Emotion |
|---|---|---|
| Fine Pen | Precise lines | Delicate |
| Brush | Fluid strokes | Dynamic |
| Charcoal | Soft, smoky textures | Mysterious |
| Mechanical Pencil | Clean and controlled lines | Structured |
In conclusion, selecting the right tools for cross-hatching is a vital step in enhancing your drawing skills. By considering factors such as line variation, ink quality, surface compatibility, and personal preference, artists can achieve desired effects and evoke specific emotional responses from viewers. Now that we have explored tool selection thoroughly, let us move on to the next section where we will explore different cross-hatching techniques.
Transition into subsequent section:
With the appropriate tools at hand, it’s time to delve deeper into exploring various cross-hatching techniques to further elevate your artistic prowess.
Exploring different cross-hatching techniques
Enhancing Your Drawing Skills in Visual Arts through Exploring Different Cross-Hatching Techniques
In the previous section, we discussed the importance of selecting the right tools for cross-hatching. Now, let’s delve into the realm of exploring different cross-hatching techniques to further elevate your drawing skills in visual arts.
To illustrate the effectiveness of these techniques, let’s consider a hypothetical example involving an artist named Jane. Jane has been experimenting with various subjects and styles but feels that her drawings lack depth and dimensionality. She decides to explore different cross-hatching techniques to enhance her artwork.
One technique that Jane discovers is parallel hatching. By using evenly spaced lines running in one direction, she can create simple shading effects and add texture to her drawings. This technique works particularly well when depicting objects with smooth surfaces or capturing subtle gradients.
Another technique Jane experiments with is contour hatching. Instead of using straight lines, she follows the contours of the subject matter with curved hatches. This approach allows her to emphasize form and volume while adding a sense of movement and energy to her artwork.
Lastly, Jane explores cross-contour hatching where she combines both parallel and contour hatches. This technique enables her to capture intricate details by layering multiple sets of hatch marks at varying angles. The interplay between light and shadow becomes more pronounced, resulting in a realistic portrayal of three-dimensional forms.
These different cross-hatching techniques offer artists like Jane a range of possibilities for creating visually captivating artworks. As they master these techniques, their drawings will exhibit enhanced depth, texture, and realism – qualities that are sure to engage viewers on an emotional level.
Let us now move forward into our next section about “Mastering shading and texture with cross-hatching,” as we continue our journey towards honing our artistic skills through this versatile drawing method.
Mastering shading and texture with cross-hatching
Exploring different cross-hatching techniques has provided artists with a solid foundation for creating intricate and visually appealing drawings. Now, let us delve further into the art of cross-hatching by focusing on mastering shading and texture. By refining these skills, artists can elevate their work to new levels of sophistication and realism.
To illustrate the impact of shading and texture in cross-hatching, consider the following example: Imagine an artist depicting a forest landscape using only black ink and various cross-hatching techniques. Through precise control over the density, direction, and spacing of lines, they are able to convey depth, volume, and surface qualities such as rough bark or soft foliage. This level of mastery not only captivates viewers but also allows them to immerse themselves in the artwork’s atmosphere.
Mastering shading and texture through cross-hatching involves several key elements:
- Variation in line weight: Artists can achieve contrasting values by varying the thickness of their lines. Thin lines may denote areas of light while thicker lines create shadows or emphasize contours.
- Layering and blending: Building up layers of hatched lines creates subtle gradations and smooth transitions between different tones. Blending adjacent hatch marks softly merges them together for seamless tonal shifts.
- Experimentation with mark-making tools: Different tools produce unique textures that add richness to artworks. For instance, using a stippling technique involving small dots instead of continuous lines can simulate coarse surfaces or delicate patterns.
- Observation and study: Close observation of real-life objects or studying reference materials helps artists understand how light behaves when interacting with different surfaces. This knowledge enables them to accurately depict textures like fur, metal, fabric, or skin.
By incorporating these principles into their artistic practice, individuals can truly unlock the potential within cross-hatching. As we move forward into our exploration of creating depth and dimension with this technique in the next section, you will discover even more possibilities for expressing your creativity on paper.
Creating depth and dimension with cross-hatching expands upon the foundation established in exploring different techniques.
Creating depth and dimension with cross-hatching
Section H2: Creating depth and dimension with cross-hatching
Imagine you are drawing a landscape scene, depicting rolling hills fading into the distance. You want to capture the sense of depth and three-dimensionality in your artwork, making it come alive on paper. This is where cross-hatching can truly shine, enabling you to create stunning visuals that bring your drawings to life.
Cross-hatching is not only a technique for shading and texture but also an effective tool for adding depth and dimension to your artwork. By layering intersecting lines at varying angles, you can simulate shadows, contours, and even volume. Let’s explore how this technique can be utilized to enhance the visual impact of your drawings:
- Building form: Cross-hatching allows you to construct solid shapes by carefully placing hatch marks along the contours of objects. By adjusting line density and spacing, you can suggest the roundness or angularity of different forms.
- Conveying light and shadow: Utilizing cross-hatching techniques, you can indicate areas of light and shadow within your composition effectively. Dense crosshatching indicates deep shadows while lighter hatches represent subtle gradients.
- Creating texture: With well-placed crisscrossed lines, you can depict various textures convincingly – from rough surfaces like tree bark to smooth materials such as glass or satin fabric.
- Portraying perspective: Cross-hatching helps establish spatial relationships between elements in your drawing. Varying the intensity of hatch marks as they recede into the background creates the illusion of depth and adds realism.
To further illustrate these points:
![Emotional bullet point list]
- Witness how simple parallel lines evolve into intricate patterns evoking architectural marvels.
- Observe as seemingly flat images transform into multidimensional representations through strategic deployment of cross-hatching.
- Experience the transformative power of mastering this technique as mundane subjects become visually captivating works of art.
- Feel the satisfaction of creating astonishing visual effects solely with your artistic skills.
Moreover, consider this three-column table showcasing the impact of cross-hatching:
| Subject | Without Cross-Hatching | With Cross-Hatching |
|---|---|---|
| Portrait | Flat and lacking depth | Lifelike and sculptural |
| Landscape | Two-dimensional and dull | Three-dimensional and captivating |
| Still Life | Static and uninteresting | Dynamic and textured |
By harnessing the potential of cross-hatching, you can uplift your drawings to new heights. In our next section, we will delve into practical tips and tricks that will enable you to refine your cross-hatching skills even further, empowering you to create stunning works of art that leave a lasting impression on viewers.
Tips and tricks for improving your cross-hatching skills
Section H2: Tips and Tricks for Improving Your Cross-Hatching Skills
Transitioning from the previous section on creating depth and dimension through cross-hatching, let us now explore some valuable tips and tricks that can help you enhance your cross-hatching skills even further. By incorporating these techniques into your artistic practice, you will be able to create more intricate and visually captivating drawings.
To illustrate the effectiveness of these tips, consider the following hypothetical example: Imagine an artist who is struggling with achieving smooth transitions between different values in their artwork. They often find their cross-hatching lines too rigid or inconsistent. By implementing the strategies outlined below, this artist could overcome their challenges and achieve a more polished and nuanced drawing style.
Here are some recommended tips and tricks:
- Vary line weight: Experiment with using both thick and thin lines in your cross-hatching to add visual interest and depth to your drawings.
- Follow contour lines: Pay attention to the shape of the object you are drawing and let its contours guide the direction of your hatched lines.
- Consider light source: Determine where the main light source is coming from in your composition, as it will influence how shadows fall on objects. Adjust your hatch lines accordingly to accurately represent light and shadow.
- Practice layering: Instead of relying solely on one layer of cross-hatching, try building up multiple layers gradually to create richer tonal values.
In addition to these tips, referring to a table comparing different types of pen nibs commonly used for cross-hatching can provide useful insight when selecting tools for your artwork:
| Nib Type | Description | Suitable For |
|---|---|---|
| Ballpoint | Provides consistent width | Beginner-friendly |
| Crowquill | Delivers precise fine lines | Detailed illustrations |
| Brush | Allows variation in line thickness | Expressive styles |
| Dip Pen | Offers versatility and line variation | Experienced artists |
By incorporating these tips into your artistic practice and using the appropriate tools, you will be well on your way to mastering cross-hatching. Remember that consistent practice and experimentation are key in developing your own unique style. Embrace the challenges and rewards of this technique, and let it enhance your drawing skills in visual arts.
Comments are closed.